You don’t want to ride a bike with tires that aren’t inflated to the right pressure. Not only will it affect your riding performance negatively, but it can also be a safety hazard.
If you’ve just got your first fat bike or are planning to buy one, you’ll be surprised to know that fat tires are inflated to a very low PSI (Pounds Per Square Inch). However, it’s important to note that the exact fat tire pressure can vary from situation to situation.
In this article, we’ll discuss everything you need to know about fat bike tire pressure. It’ll help you inflate your fat bike to the right pressure to enjoy a smooth and safe ride.
So, let’s jump into it.
What’s Inside
Why it’s important | Why do fat tires use low pressure | When to increase or decrease tire pressure | Recommended tire pressure by terrain | How to measure and adjust tire pressure
Fat Bike Tire Pressure: Why It Is Important
Fat bike tire pressure is important because it determines the bike’s performance, handling, and safety. Changing it will affect how the bike rides, including how it corners, how quickly it moves, and how much effort it takes to pedal.
The tire will deform more quickly if the pressure is too low, and it’ll result in cornering instability and slower speeds. You’ll also need to put more effort to pedal and move forward.
On the other hand, the tire will start to bounce more and lose traction when the pressure is too high. It’ll make it difficult for you to control the bike, which can be extremely dangerous, especially on a busy road.
Therefore, it’s critically important to check the pressure of your fat bike’s tire regularly and adjust it if necessary. It’ll provide optimal bike performance and a safe riding experience. In addition, it’ll also maximize the lifespan of tires by preventing them from wearing out quickly.
Why Do Fat Tire Bikes Use Low Tire Pressure?
Fat bikes use low tire pressure to improve riding performance in challenging terrains, such as snow and sand. It allows more tire surface area to come in contact with the ground, increasing grip and stability.
Generally, you need to inflate the tire of mountain bikes to 40 to 60 PSI, but a fat bike can perform optimally at 10 PSI.
It’ll provide you with additional cushioning to ride the bike comfortably for longer periods. In addition, it’ll also decrease the risk of slipping or sliding on uneven or slippery surfaces.
Having low pressure in fat tires will also improve the shock absorption of your bike. The greater contact area between the tire and the ground will absorb the shocks and bumps of rough terrain easily, providing you with a smoother ride.
Another benefit of low tire pressure is that it improves the bike’s handling. The increased tire surface area improves grip and traction, making it easier to maneuver the bike through corners and turns. This is especially important when cycling on steep or bumpy terrain.
When You Should Increase Fat Bike Tire Pressure
Increasing tire pressure in your fat bike can improve your riding performance in certain conditions. For example, when you’re riding on hard-packed snow or ice, you should use higher pressure.
It’ll prevent the tires from sinking in and allow them to roll more smoothly over the hard surface. As a result, you’ll enjoy a faster and smoother ride.
Increased pressure can also improve the riding experience on smoother terrain like pavement or hard-packed dirt. However, it’s important to note that it’ll also reduce traction and comfort. It means that you’ll have less grip and feel more bumps and vibrations on the trail.
If you find yourself frequently bottoming out your rims, it could be an indicator that the tire pressure is too low. In this case, you should increase the tire pressure as soon as possible to prevent the wheels from getting damaged.
In addition, if you’re slipping and sliding around corners or need to put a lot of effort to speed up the bike, your tire pressure is low and needs to be increased.
When You Should Decrease Fat Bike Tire Pressure
When you need to ride your fat bike on soft terrain, decreasing the tire pressure will help. It’ll increase the contact area between the ground and tires and improve your bike’s traction. You’ll have better control over your bike to ride safely on soft surfaces, such as fresh snow or sand.
We recommend you decrease the tire pressure to as low as 10 PSI (or even lower) as a starting point. But make sure that you maintain enough pressure to avoid pinch flats.
It’ll increase the ride’s stability and allow the tires to absorb shocks and vibration from the terrain effectively.
Recommended Fat Bike Tire Pressure
Now that you understand when to increase or decrease fat tire pressure, let’s discuss the recommended pressure values for different terrains.
Keep in mind that the following recommendations are just a starting point. The ideal tire pressure for your ride will depend on a variety of factors, such as your weight, the weight of your bike, and your personal preference.
So, consider experimenting with different tire pressures to find out what works best for you.
Sand
When riding on loose or dry sand, a tire pressure of 4 to 6 PSI is recommended. It’ll increase the traction and prevent the bike from sinking in the sand.
But if you’re planning to ride your bike on packed or wet sand, you should inflate your fat tire to 6 to 8 PSI. It’ll provide you with more stability and control needed to ride safely on the harder surface.
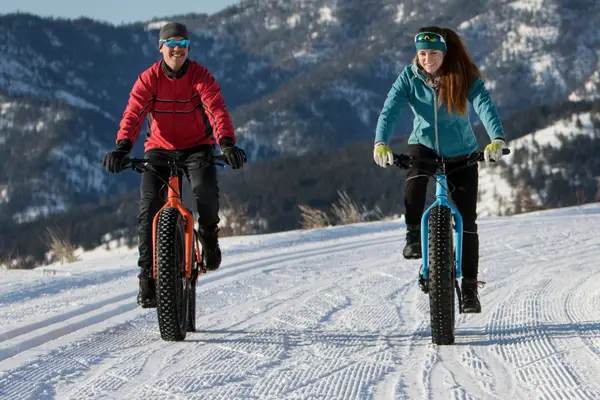
Snow
Generally, a tire pressure of 1 to 6 PSI is recommended for riding a fat bike in the snow. However, the ideal tire pressure can vary depending on the type of snow.
For soft, fresh snow, a lower tire pressure of 1 to 4 PSI will work better, as it’ll improve the traction and keep the bike from sinking in.
Whereas, you should inflate your fat tires to 2 to 6 PSI for harder-packed snow or icy conditions. It’ll prevent the bike from slipping and allow you to control it easily.
Rocky Trails
When riding on rocky trails, we recommend a higher tire pressure of between 6 and 10 PSI. It’ll reduce the risk of slipping and allow you to have better control over the bike.
However, if the rocks are particularly large or uneven, reducing the pressure to 5 to 8 PSI will be a better option. It’ll increase the cushioning effect to effectively absorb shock from the rough terrain.
Road
For road (or any hard and flat surface) riding, a tire pressure of 10 to 15 PSI will serve as a good starting point. This higher pressure will provide a smoother and faster ride.
But if the road is a bit bumpy, make sure that you reduce the pressure by a couple of PSI points. Not only will it improve the ride comfort, but it’ll also keep your fat tires safe.
How to Measure and Adjust Fat Bike Tire Pressure
If you want to learn how to measure and adjust fat bike tire pressure, consider following the steps listed below. It’ll help you ensure that you have the correct tire pressure for your ride, depending on the terrain.
- The first step in measuring tire pressure is to use a tire pressure gauge. It’s an invaluable tool that will help you accurately measure the air pressure in your fat tires.
- Look at the recommended tire pressure on the sidewall of your tire or check the user’s manual for the recommended tire pressure. If you don’t find that, use the values listed in this guide, depending on the terrain you want to ride on.
- Use a pump to add or release air until you reach the desired tire pressure. If you’re lowering tire pressure, release air in small increments and check the pressure frequently to avoid over-deflating the tire.
- Once you’ve adjusted the tire pressure, take a short test ride to ensure that the tire pressure is suitable for the trail conditions.
- Next, adjust the pressure if it’s needed.
Enjoy the ride.
Important Note: Make a habit of checking your fat tire pressure before each ride, especially if you ride on different types of terrains. It’ll allow you to enjoy the ride and keep the tires in good condition.
Conclusion
Fat bike tire pressure is a crucial factor in determining the quality of your ride. Adjusting it according to the surface you’re riding on can enhance your experience and prevent potential damage to your bike.
Generally, you should reduce the pressure for softer surfaces and increase it for harder ones. You can use the values discussed in this guide as a starting point but make sure that you experiment with different pressure settings. It’ll help you find out what works best for you.
